

Theo như lời giới thiệu thì nó là "Automated ImageMagick compilation from sources for Debian/Ubuntu including advanced delegate support."
ImageMagick mặc định của Debian/Ubuntu
Mặc định thì hệ điều hành linux nào cũng rất dễ cài đặt ImageMagick.
Nhưng vì sao lại cần script này thì đây.
Đầu tiên chạy một docker container ubuntu 22.04 để thử nghiệm
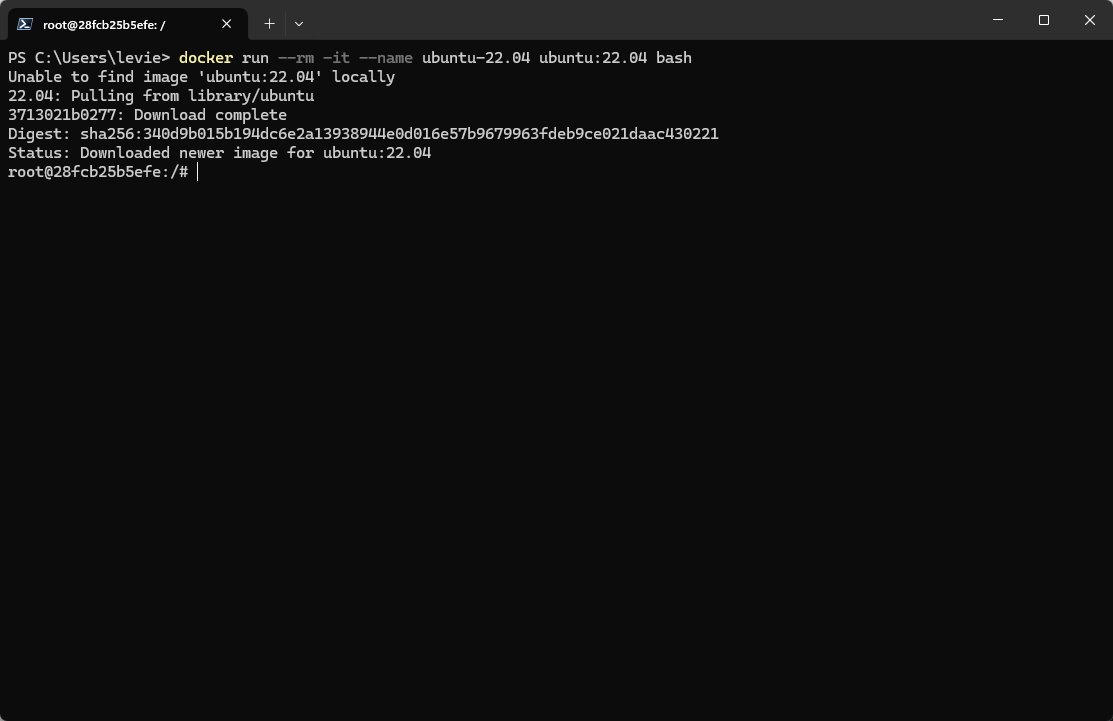
root@28fcb25b5efe:/# apt list ImageMagick -a
Listing... Done
imagemagick/jammy-updates,jammy-security 8:6.9.11.60+dfsg-1.3ubuntu0.22.04.5 amd64
imagemagick/jammy 8:6.9.11.60+dfsg-1.3build2 amd64Code language: Bash (bash)
Dùng thì cũng chẳng sao, nhưng có một vấn đề to bự là
root@28fcb25b5efe:/# convert -version
Version: ImageMagick 6.9.11-60 Q16 x86_64 2021-01-25 https://imagemagick.org
Copyright: (C) 1999-2021 ImageMagick Studio LLC
License: https://imagemagick.org/script/license.php
Features: Cipher DPC Modules OpenMP(4.5)
Delegates (built-in): bzlib djvu fftw fontconfig freetype heic jbig jng jp2 jpeg lcms lqr ltdl lzma openexr pangocairo png tiff webp wmf x xml zlib
root@28fcb25b5efe:/# magick -version
bash: magick: command not found
root@28fcb25b5efe:/#Code language: Bash (bash)
Sáng sửa project cho đồng nghiệp, thì phát hiện ra code trên Windows và cái phiên bản 7.x.
Mà 7 thì nó sẽ dùng magick thay cho convert, không lẽ giờ sửa code, thì push lên mấy chục file thay đổi thì lại quá đáng quá.
Nên cách giải quyết là cài ImageMagick 7 cho Debian/Ubuntu thôi.
Cài đặt ImageMagick 7 cho Debian/Ubuntu
Đối với phần lớn ứng dụng, thì việc chạy một command
# ./configure
# make
# make installCode language: Bash (bash)
Thường sẽ cài được và khá hoàn chỉnh phù hợp nhu cầu chung.
Nhưng thằng ImageMagick này lại rất khác, nó yêu cầu cực kì nhiều các thư viện (libs) để hỗ trợ đầy đủ cho Delegates
Việc thêm libs và thêm từng dòng config một, và sửa lỗi nữa tốn quá nhiều thời gian.
Nên đơn giản hoá thì
IMEI - ImageMagick Easy Install
Chạy script tạo ra để cài đặt đỡ tốn thời gian hơn, nhưng tạo khá nhiều rác, nhưng kệ đi.
Trang chủ hỗ trợ: https://github.com/SoftCreatR/imei
Theo hướng dẫn thì chạy như vậy thôi
1 click install:
t=$(mktemp) && \
wget 'https://dist.1-2.dev/imei.sh' -qO "$t" && \
bash "$t" && \
rm "$t"Code language: Bash (bash)
Clone từ github
git clone https://github.com/SoftCreatR/imei && \
cd imei && \
chmod +x imei.sh && \
./imei.shCode language: Bash (bash)
Options và Default:
Currently available build options are
--skip-dependencies/--skip-deps: Skip installation of dependencies--imagemagick-version/--im-version: Build the given ImageMagick version (e.g.7.1.1-25)--force-imagemagick/--force-im: Force building of ImageMagick only, even if it's are already installed in a newer or the latest version--imagemagick-quantum-depth/--im-q: ImageMagick Quantum Depth (8, 16 or 32)--imagemagick-opencl/--im-ocl: Install ImageMagick with OpenCL support--imagemagick-static/--im-static: Enables static libraries, disables shared libraries--aom-version: Build the given aom version (e.g.3.8.0)--skip-aom: Skip building aom--libheif-version/--heif-version: Build the given libheif version (e.g.1.17.6)--skip-libheif/--skip-heif: Skip building libheif--jpeg-xl-version/--jxl-version: Build the given JPEG XL version (e.g.0.9.0)--skip-jpeg-xl/--skip-jxl: Skip building JPEG XL--log-file: Log everything to the file provided--work-dir: Download, extract & build within the directory provided--build-dir: Build target directory for ImageMagick--config-dir: Config target directory for ImageMagick--force: Force building of components, even if they are already installed in a newer or the latest version
Additional options / switches:
--no-sig-verify/--dev: Disable signature verification on startup--use-checkinstall/--checkinstall: Usecheckinstallinstead ofmake--build-only: Used in combination with--use-checkinstallto build packages, without installing them--no-backports: Disable temporary installation of OS backports (they may be used anyways, depending on your server configuration)
Default options :
- ImageMagick version:
7.1.1-36 (Q16) - libaom version:
3.9.1 - libheif version:
1.18.2 - libjxl version:
0.10.3 - Log File:
/var/log/imei-###.log(###will be the timestamp of the script execution) - Work Dir:
/usr/local/src/imei - Build Dir:
/usr/local - Config Dir:
/usr/local/etc
Vậy giờ chạy thử nhé, dùng cách 1.
root@edb736b39e44:/# t=$(mktemp) && \
wget 'https://dist.1-2.dev/imei.sh' -qO "$t" && \
bash "$t" --build-dir /usr/local/magick --no-backports --no-sig-verify
Code language: Bash (bash)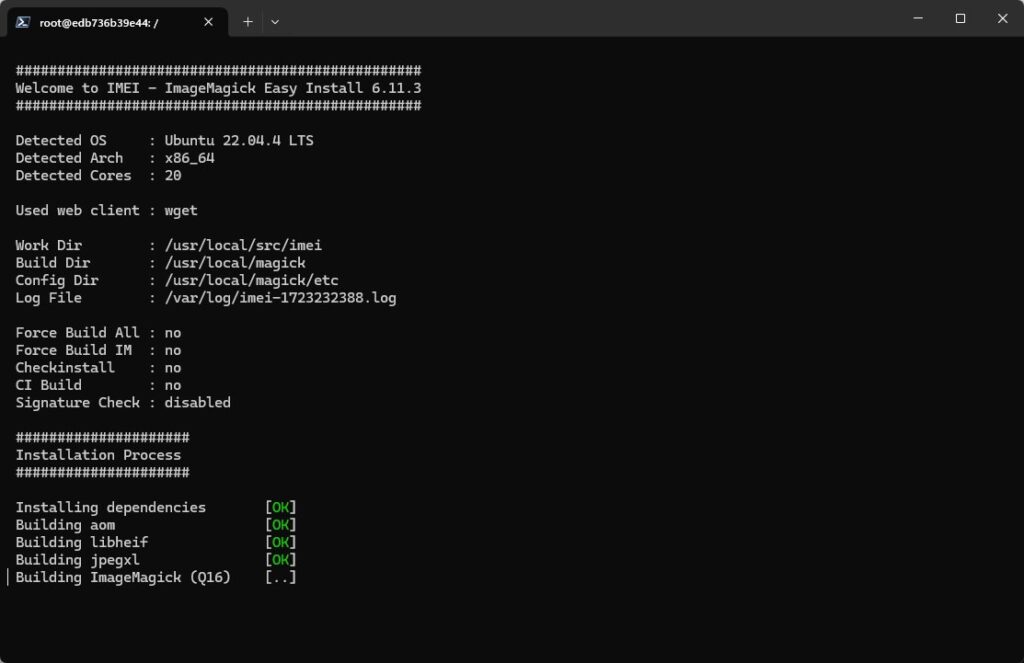
Nếu không tuỳ chỉnh thì quá trình build bao gồm:
- Install deps
- Build libaom
- Build libheif
- Build jpegxl
- Build ImageMagick
Khi hoàn tất sẽ trông như thế này
#################################################
 Welcome to IMEI - ImageMagick Easy Install 6.11.3
 #################################################

 Detected OS     : Ubuntu 22.04.4 LTS
 Detected Arch   : x86_64
 Detected Cores  : 20

 Used web client : wget

 Work Dir        : /usr/local/src/imei
 Build Dir       : /usr/local/magick
 Config Dir      : /usr/local/magick/etc
 Log File        : /var/log/imei-1723232388.log

 Force Build All : no
 Force Build IM  : no
 Checkinstall    : no
 CI Build        : no
 Signature Check : disabled

 #####################
 Installation Process
 #####################

 Installing dependencies       [OK]
 Building aom                  [OK]
 Building libheif              [OK]
 Building jpegxl               [OK]
 Building ImageMagick (Q16)    [OK]
 Verifying installation        [OK]

 Process has been finished successfully after 4 minutes and 36 seconds!Code language: Bash (bash)
4 Phút 36 giây. Thật tuyệt vời.
Trong lúc cái máy mình nó kiểu như này
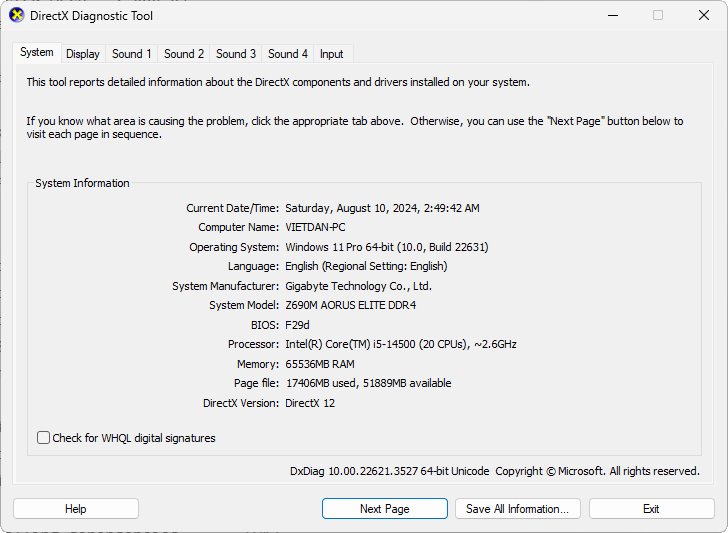
Tự Compile ImageMagick từ Source Code
Mất tầm 1 - 2 giờ để cài cho đủ những libs cần thiết, vì sẽ có những cái tìm không thấy và cài từ source code, nếu may mắn hơn thì ngồi mò tầm 15p là đủ:
Dành cho ai muốn cực khổ thì có đám này:
libde265-dev libx265-dev libltdl-dev libopenjp2-7-dev liblcms2-dev libbrotli-dev libzip-dev libbz2-dev liblqr-1-0-dev libzstd-dev libgif-dev libjpeg-dev libopenexr-dev libpng-dev libwebp-dev librsvg2-dev libwmf-dev libxml2-dev libxml2 libtiff-dev libraw-dev ghostscript gsfonts ffmpeg libpango1.0-dev libdjvulibre-dev libfftw3-dev libgs-dev libgraphviz-devCode language: Bash (bash)./configure --prefix="/usr/local" --sysconfdir="/usr/local/etc" CFLAGS="-O3 -mtune=generic" CXXFLAGS="-O3 -mtune=generic" --enable-shared --enable-openmp --enable-cipher --enable-hdri --enable-docs --${OPENCL_C}-opencl --with-threads --with-modules --with-quantum-depth="16" --with-magick-plus-plus --with-perl --without-jemalloc --without-tcmalloc --without-umem --without-autotrace --with-bzlib --with-x --with-zlib --with-zstd --without-dps --with-fftw --without-flif --without-fpx --with-djvu --with-fontconfig --with-freetype --with-raqm --with-gslib --with-gvc --with-heic --with-jbig --with-jpeg --with-jxl --with-lcms --with-openjp2 --with-lqr --with-lzma --with-openexr --with-pango --with-png --with-raw --with-rsvg --with-tiff --with-webp --with-wmf --with-xml --with-dejavu-font-dir='/usr/share/fonts/truetype/ttf-dejavu' --with-gs-font-dir='/usr/share/fonts/type1/gsfonts' --with-urw-base35-font-dir='/usr/share/fonts/type1/urw-base35' --with-fontpath='/usr/share/fonts/type1' PSDelegate='/usr/bin/gs'Code language: Bash (bash)Còn làm ra sao thì bỏ đi, đừng tốn thời gian vô ích.
Tích hợp ImageMagick 7 vào Docker Image
Thật ra mục đích cài đặt vì muốn làm Containerization cho ứng dụng và chạy trên K8s, đây là một step build và copy thôi, multi stage chứ không cái output chắc cũng tầm 2GB
Cái này nợ, sẽ viết sau.
Thành quả: ImageMagick 7 trên Debian/Ubuntu
Dù làm cách nào thì cuối cùng cũng có thể chạy được lệnh magick rồi
root@edb736b39e44:/# /usr/local/magick/bin/magick -version
Version: ImageMagick 7.1.1-36 Q16-HDRI x86_64 58ddb87ca:20240726 https://imagemagick.org
Copyright: (C) 1999 ImageMagick Studio LLC
License: https://imagemagick.org/script/license.php
Features: Cipher DPC HDRI Modules OpenMP(4.5)
Delegates (built-in): bzlib cairo djvu fftw fontconfig freetype gslib gvc heic jbig jng jp2 jpeg jxl lcms lqr ltdl lzma openexr pangocairo png ps raqm raw rsvg tiff webp wmf x xml zip zlib zstd
Compiler: gcc (11.4)Code language: JavaScript (javascript)
Hi vọng bạn đạt được điều mình muốn. Chứ cài này lâu quá


Responses (0 )